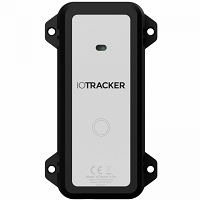
ioTracker 3 Pro
The ioTracker 3 Pro is a multi-sensor IoT tracker which uses NB-IOT, LTE-M or EGPRS for connectivity. We have developed the full product (PCB and firmware) in house. We have done our best to create a product which can be used for a wide spread of applications. Our trackers are highly configurable and the settings can be configured over-the-air. The most important settings will be addressed in this documentation.
Please don't hesitate to contact us if you need a specific configuration for your use case. There is a good chance we have already implemented it or we can address it for a future firmware release.
You can contact us via the contact form on our website or via e-mail: info@iothings.nl.
Housing
The ioTracker 3 Pro has an industrial, water- and dustproof enclosure. The dimensions of the ioTracker 3 Pro are 116 x 52 x 30mm.
Mounting options
Screws
The backplate features four countersunk holes for attachting the backplate with screw to an object.
Sticky tape
We advice to use VHB tape from the brand 3M for attachting the ioTracker 3 to an object. This tape is very strong and ensures a reliable assembly.
Positioning
The ioTracker has several internal sensors on board, which can be used for indoor and outdoor positioning.
GPS
The ioTracker uses the uBlox EVA-M8M GPS chip. This chip can maintain contact with 2 satellite networks at the same time. In addition to GPS, you can choose between Galileo, GLONASS and/or BeiDou. The position can be determined within a few meters accuracy, but the energy consumption of this method is the highest. There are various configuration options to activate GPS only when it's really necessary. GPS positioning is only suitable for outdoor use.
WiFi
The ioTracker has the Espressif ESP8285 WiFi chip on board. This makes it possible to scan for WiFi networks on the 2.4 GHz band. The networks which are found (BSSIDS), together with the signal strenght (RSSI) are added to the payload. The energy usage of WiFi scanning is relatively limited, which is why this function is performed every time the ioTracker moves. This function is suitable for indoor and outdoor positioning.
Bluetooth Low Energy
With the Nordic nRF52832 BLE 5.1 chip it's possible to use various Bluetooth Low Energy functions. Like WiFi, the networks which are found (BSSIDS), together with the signal strenght (RSSI), can be added to the payload. Also it's possible to configure UUID filters and triggers. For example: When a certain UUID is absent, the ioTracker can automatically send an uplink or enable GPS. BLE is the most energy efficient way to determine the location and is suitable for indoor and outdoor positioning.
Sensors
Temperature
The measuring range of the TI TMP116 temperature sensor is between -25 °Celsius and + 85 °Celsius. It has a resolution of 0.01 ° Celsius and an accuracy of 0.2 °Celsius.
Light
The measuring range of the TI OPT3001 light sensor is between 0.01 lux and 83000 lux. It has a resolution of 0.01 lux and a relative accuracy of 0.2 %.
Shocks (3D accelerometer)
The measuring range of the ST LIS2DE12 accelerometer is ± 2/4/8 or 16 g. It has a corresponding sensitivity of 15.6 / 31.2 / 62.5 / 187.5 mg/digit.
High Shocks (optional)
The measuring range of the ST H3LIS200DL high g-shock sensor is ± 100 or ± 200 g. It has a sensitivity of 780/1560 mg/digit.
Humidity (optional)
The measuring range of the Bosch BME280 humidity sensor is between 0 % and 100 % relative humidity. It has a sensitivity of ± 3 % and a hysteresis of ≤ 2 %.
Air pressure (optional)
The measuring range of the Bosch BME280 air pressure sensor is between 300 hPa and 1100 hPa. It has a sensitivity of ± 0.25 % and the RMS noise value is 0.2 Pa.
I/O ports
The ioTracker 3 Pro has four input/output (i/o) ports. External sensors can be connected via Serial (UART), I2C, GPIO and analog. The sensor cable need to be attached to a JST ZHR-7 connector with the following PIN layout:
| Pin | Description |
|---|---|
| 1 | 2V5 |
| 2 | DEBUG_RX |
| 3 | DEBUG_TX |
| 4 | SCL_EXP |
| 5 | SDA_EXP |
| 6 | GROUND |
| 7 | 24V |
Button
The ioTracker 3 Pro features a multi-functional button which supports multiple sequences (single, double and login click) and multiple actions (send uplink, start GPS etc.)
Battery
Battery life
The battery life of the ioTracker 3 Pro depends heavily on user specific configurations. Things like the uplink interval, usage of GPS/WiFi/BLE or the used network technology and signal quality impacts the battery life.
With our battery calculator you can calculate the predicted battery life for your configuration and use case.
Battery type
The ioTracker 3 Pro uses two rechargeable Lithium batteries, which works on 3.6 volts and has capacity of 7200 mAh in total. You can also find these batteries under the name LS18500.
Operating window
Typically this type of batteries have a operating window from -20° up to +65° Celsius. Please check the datasheet of your battery manufacturer for more information.
Charging
The ioTracker 3 Pro can be charged via de micro USB port. You can also connect an external power source with a voltage between 6 V - 28 V to the JSB connector on the PCB
Status indicators (LED and buzzer)
Single green blink
- The ioTracker sends an uplink message
Double green blink
- First green blink: The button is pushed
- Second green blink: The ioTracker sends an uplink message
Triple continuous green blink
- The GPS function is active
Single yellow blink
- Sleep mode is active
Double continuous orange blink and beep
- The ioTracker failed to receive an acknowledge after sending an confirmed uplink message
Triple continuous orange blink and beep
- The alarm function is active
Triple blue blink
- The bluetooth function is active
Reset procedure
In case you are experiencing issues, the ioTracker can be reset with the following actions:
Normal reset
-
Press and keep holding the button;
-
The ioTracker starts beeping;
-
Release the button and briefly press it again;
As a result, the ioTracker:
-
Will be rebooted;
-
Join the network again;
-
Keep the settings, also as configured via the app/dashboard/API;
-
Reset the battery level to 100%.
Factory reset
-
Press and keep holding the button;
-
The ioTracker starts beeping; keep holding;
-
The ioTracker starts beeping at a different tone;
-
Release the button and briefly press it again;
As a result, the ioTracker:
-
Will be rebooted;
-
Join the network again;
-
Reset the settings to factory default (network settings/keys excluded);
-
Reset the battery level to 100%.
Deep sleep mode
The deep sleep mode will be activated when the voltage of the battery get's to low. When the button is pressed a short yellow blink indicates that the deep sleep mode is active.
With a long press on the button, the ioTracker will get out of the deep sleep mode. It's recommend to check or replace the battery when this occurs.
Warranty
Unless expressly stated otherwise in writing, the warranty period on hardware is 24 months for consumers and 12 months for other Other Parties. The warranty period starts from the moment the hardware is delivered.
If you are experiencing problems please contact us via the contact form on our website or via e-mail: info@iothings.nl.
If you are experiencing problems after the warrenty is expired, please also contact us and we have a look at it on a best effort and case-by-case basis.
RMA
You may return defect devices the the following address:
ioThings
Pastoor Debijestraat 42
5963 AG Hegelsom
The Netherlands
Please add a note with your company details in the shipping box.